So, you just read the Chores for Hire Magnet Board post that proceeds this one?... Well, lets just get to it then! Here is how I made the pockets and the cards that go with it. But I think first I need to cover the inspiration behind the pockets and cards:
Showing posts with label Wood Connection. Show all posts
Showing posts with label Wood Connection. Show all posts
Thursday, October 17, 2013
Monday, August 19, 2013
His & Her Towel Hangers
My bathroom space is kind of sad... a sad, sad beige. I refuse to paint any room until I can find about 3 items to go into the space that inspire me so I can start to bring the room together. I have finally reached 3 items! I found a shower curtain about 9 months ago, and with these new Facebook Group Yard Sale Site type things, I found a really cute metal cabinet. The following project is my 3rd item of inspiration, so I will be on my way to painting the space. (which will bring a new blog post as well ;)
Labels:
Crafting,
Decorating,
Wood Connection
Saturday, July 7, 2012
Monogram "Wreath"?...
Do wreaths technically have to be round, with foliage, or flowers, vines and ribbon? I don't know either... but this is close enough. Do any of you have the same problem as me, in which you you need a wreath for the other 8 months of the year when it isn't Fall, Halloween or Christmas? I decided to solve my problem with a Monogram "Wreath".
I started with this frame and wooden letter. I purchased both from the Wood Connection. figured I didn't need to snap a picture of the raw wood, so I painted it first. These strips of ribbon are the ones I choose to coordinate with the project. After painting it a light color of gray, I changed my mind and painted it a darker one.
After it was painted I sprayed it with a coat of clear gloss spray paint. Then I tied the ribbon around the frame. Keep it a tad bit loose so the board can still fit against the frame. To keep the ribbon ends from fraying you can do this quick little trick
If you can, get self drilling screw so you don't have to pre-drill. I had some of these on hand so I could anchor the triangle hanger on the top of the frame.
This is what it looks like when they are attached.
After I found a pattern of paper that I wanted, I glued the paper to the thin wood backing that comes with the frame. DO NOT ATTACH IT TO THE FRAME YET.
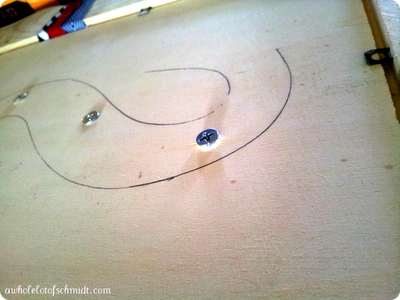
If you look closely at this picture you can see I ever so lightly traced the letter on the paper so I knew where I needed to place the screws for the next step.
Drilled 3 screws through the front side of the frame so that I would know where the holes would be behind the frame. And then removed them.
Because the backing on the frame is such a thin wood, you really want to make sure you don't counter sink the screws. Keep them above the backing like so, so you don't crack the board.
This is the side profile once the letter has been attached to the backing.
So the backing combined with the weight of the wood letter is too heavy for the little tin staples to keep the board held in- so I put large dots of glue in the corner of the frames to hold the backing in place.
Before hanging you masterpiece on your front door, I suggest that you put these little felt pads at the bottom so that it doesn't destroy your front door, or your new wreath.
And here is the finished product. :)
Labels:
Craft Group,
Crafting,
Decorating,
DIY,
Tutorials,
Wood Connection
Subscribe to:
Posts (Atom)


