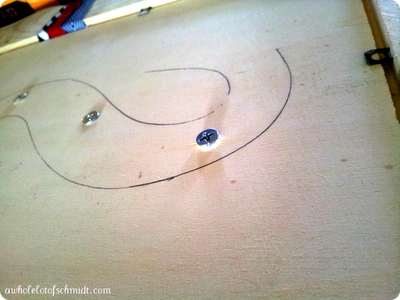
Oh my heck! This project... it will be so worth it when it is done, but if I ever get to done it will be a miracle. The table... unfortunately has had some issues {face palm}. In the post about my table I mention polycrylic binding to impurities and debrit in the wood? Well, apparently this table had them. It started to create air pockets between the wood and the finish. And then just insert kids into the mix, and the picking begins. So one night after dinner, I was looking and had to surrender to the fact this table was going to peel. And so I let them have at it. Within 5 minutes, it was peeled and stripped, along with the map and everything else. The pencil marks got left behind, so that is bonus, right? LOL!
Showing posts with label DIY. Show all posts
Showing posts with label DIY. Show all posts
Tuesday, March 17, 2015
Table Benches Part 1
Oh my heck! This project... it will be so worth it when it is done, but if I ever get to done it will be a miracle. The table... unfortunately has had some issues {face palm}. In the post about my table I mention polycrylic binding to impurities and debrit in the wood? Well, apparently this table had them. It started to create air pockets between the wood and the finish. And then just insert kids into the mix, and the picking begins. So one night after dinner, I was looking and had to surrender to the fact this table was going to peel. And so I let them have at it. Within 5 minutes, it was peeled and stripped, along with the map and everything else. The pencil marks got left behind, so that is bonus, right? LOL!
Labels:
Decorating,
DIY,
Homemade,
Recharge,
Vinyl Design
Wednesday, January 14, 2015
Table Redo Part 2
THE PREP WORK
I have refinished a lot of furniture over the last 10 years. I have done this by sanding, stripping and sometimes just painting over the top of the existing paint. It all depends on what I want the finished product to look like for which method I decide to do. In this case, I combined all 3.
The Legs
The legs were awesome as is. As in the nicks, dents and grooves were perfect and I wasn't about to touch them to ruin them. So I knew that I was going to paint over them. No sanding, no stripping. This is where we have a curtain call for a handy little product we call Denatured Alcohol. I don't know exactly how it works, but it does. You get an old rag and saturate it with the denatured alcohol. Thoroughly wipe down the surface you are going to paint over. This type of alcohol seems to penetrate through the existing paint (whether it is acrylic, latex, oil, or enamel) and preps the surface for the new paint to adhere. And adhere it does.
I used Rustoleum spray paint in Almond. I feel like their paint seems to have more saturation of color so more covering power, and their color is just pure color. You get excellent coverage and you only have to wait minutes in between coats verses hours. Always read the back of the can of the spray paint you are using. Not all spray paint is the same. And if you do not re coat within the window of time on the back of the can- WAIT. Always wait. If you don't, then you run the risk of it peeling or not adhering, or scratching off. Just trust me on this.
The legs took me a grand total of like 60 minutes.
The Tabletop
This was a little more of a delicate part of the table. I needed to strip down the paint because I wanted the top to be a wood color. I didn't want to sand it down, and I am really glad I didn't. It would have been a huge expense in just sand paper. I tried a small part and it kept gumming up underneath the paper. So I got out the paint stripper. The one I use is spray able and I am all about easy. I sprayed it on the table top. By the time I got to the end of the table it had been the 15 minute wait time to start scraping off the paint. I recommend gloves. I don't know what is in paint stripper, but I know there is enough of something to eat away years and layers of paint. So I am sure eating through your delicate skin is no problem (yes, it burns...badly).
I got a really nice surprise as I scraped off the paint. There was a perfectly oiled butcher block like table top. Who covered this up?!? Well, no wonder the sand paper was gumming up. It smelled like Danish Oil under the black paint. So I am sure that was another reason the paint came off so easily. There were parts that left little flecks of the black paint behind. But I couldn't have placed them more perfectly. My husband, that is new to this DIY redo stuff kept asking if I was gonna get it off. I just kept laughing at him. Now that he sees it... he gets it. I did have to sand a little bit as there were places there were knots in the woods that seemed to have the sap disappeared with the paint stripper. But not much effort was put into the prep of the table top.
Next, I wanted to darken up the wood a bit, and even it all out. Not to mention the fact I am kind of picky about the color of "wood" I have in my house. It can't be too yellow or too red... just a good neutral.
So when you apply wood stain in this type of setting, the method is pretty important, to me at least. This table has all these nicks and grooves in the top and I want to make sure these depressions get the stain in them and that this color gets left behind. I use one of those cheapo little brushes from your local home improvement store to wipe a thick layer of the stain on going with the grain. Then I use a rag (that I plan on throwing away) to wipe the stain and really rub it into the wood going against the grain. I then finish it up by wiping with the grain, again. After this, I let it dry. Since I did this in sections, I used this rag to wipe onto the almond color legs to accentuate the worn look on the legs and give it a nice patina.
FINISH
At this point, if you had no intention of putting anything else on the table top, you could just seal it. So if you have no desire to paint a piece of furniture with a map or anything else, I will mention finishing before the hand painting. I have used polyurethane and polycrylic, and my vote is for polycrylic. It doesn't yellow and when it dries, it is really hard and durable for high traffic areas like tables and chairs. BUT, there is a catch... polycrylic adheres best to water based stains and paints. And if there are impurities on the wood, it tends to draw them out and bind to them instead of the wood. So in this project, I used polyurethane.
As for the chairs, I am going to refinish 4 of my chairs. The others are going to be used to create benches for the long sides of the table. I am really excited (and you should be to, because it is going to take your breath away!) for this as I am going to paint a bunch of different colors (imagine coral, gold, teal, olive green, and a brick red). So yeah, this project still has a ways to go... but it will be oh so very worth it!
HAND PAINTING & STENCILING
At this point I hand drew out the map using a pencil. I tried as best I could to come as close as possible to what the map looked like. Of course, I am not perfect, so there are errors, and mistakes.
I used a very small brush (a nail striper) to trace the lines of everything that was not a stencil. I used a more full (eye) liner brush for the pink, green, and yellows. And just a regular paint brush for the stenciling.


At this point I hand drew out the map using a pencil. I tried as best I could to come as close as possible to what the map looked like. Of course, I am not perfect, so there are errors, and mistakes.
I planned the vinyl, and positioning of all the stencils.
Here is a close up of the compass rose in the upper right corner of the table.
And this is a close up of the map name I designed. it is stenciled in the top middle of the table.
I used a very small brush (a nail striper) to trace the lines of everything that was not a stencil. I used a more full (eye) liner brush for the pink, green, and yellows. And just a regular paint brush for the stenciling.


I peeled the stencils while they were still wet so that the paint didn't peel off with the stencil when it dried. Once this was all dry, I began applying the polyurethane.
And after hours of waiting to dry, I had to call in an army of guys to lift this heavy thing into the kitchen. We had only minor injuries... :)
I apologize for the dark pictures, but it is winter in Utah. The sun goes down early, and I have an east facing house with a covered porch. It is just not a great combo for will lit photos.
This one gives you a view of the chairs I still have to refinish....
Thanks for stopping by... I better get going! I am really excited to get started on those chairs!!
#rustoleum #tableredo #awholelotofschmidt #tableredowithvintagedutchmap
Labels:
Crafting,
Decorating,
DIY,
Recharge,
Tutorials,
Vinyl Design
Tuesday, November 4, 2014
Table Redo Part 1
So I know for the last year in my Coming Up section has been some info about redoing my current table. The day I sprayed that first chair, it snowed later that night. Ugh... Total frustration! It put a damper on getting anything else on it done. I do believe now it was divine intervention as my life has so drastically changed that if I would have redone that table, it would have been for nothing...
Labels:
Decorating,
DIY,
Homemade,
Recharge,
Self Care,
Vinyl Design
Sunday, February 9, 2014
Homemade Lotion {Bars}
A few of my kiddos have skin issues in the colder months. When Bradley was little he would get these dark red patches in his elbows, behind his knees- and as he has gotten older, his hands crack open and bleed on his knuckles, poor kid. Megan does too. I was grateful for a practical doctor that just had us mix Aquaphor and a tube of Hydrocortisone Cream together and that was as good as any prescription we tried, and that did the trick. But honestly- hydrocortisone is a steroid. Do I really want to put that on their skin for 5 straight months? Not really....
Sunday, December 1, 2013
Tuesday, September 24, 2013
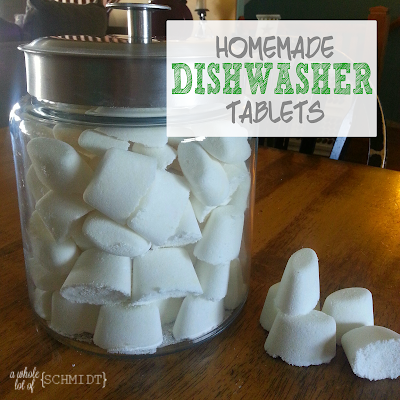
Homemade Dishwasher Tabs
I know there are A LOT of recipes around the web for dishwashing tabs, but I promise these are a bit different. I developed a recipe that stays clumped together so you can add the dishwashing liquid to the tabs and then allow them to dry. That way you will never forget to add it to a load of dishes and end up with the yucky white film.
Here in UT we have really hard water. Like really hard water. Yes, you can buy water softeners, but we don't have one... yet. Hopefully soon. But until then, I have to become more resourceful. I have really gotten into making some of my own homemade products.
Wednesday, July 24, 2013
{Lemon Peppermint} Whipped Body Butter
I am kind of into the DIY at home products you see all over Pinterest. I will be posting about more coming soon, as the experience has been great. I tried something drastic (no poo-ing) and it has created a snowball effect in so many self care areas, and I am sure I have released a demon inside. I loved this product! It was cool to choose the scent I wanted. It feels great on my skin too, and the moisture is incredible.
This is the pin that has inspired my recipe. Don't be intimidated when you read the whole post. Remember, you always have a choice as to how you want to proceed. Even though I find the concept of Beef Tallow really interesting, I opted not to use it in this recipe. A few notes on this:
Labels:
DIY,
Inspired by Pinterest,
Recipes,
Tutorials
Tuesday, July 23, 2013
Painting Horizontal Stripes...on the Archway
I am so excited to say my archway is not dreaded anymore! Yay for me! It has been a long time coming, and with a great deal of thought too. If you didn't see the post on how it was the The Dreaded Archway, click here. I had knee surgery in March and was on crutches for 4 weeks. I spent A LOT of time on my bed, looking out through my doorway into the archway, and I think my decision was pretty thought out. Drum roll please.......
Labels:
DIY,
Home Improvement,
Tutorials
Friday, February 8, 2013
Tackling the Master Closet
We all have those problem areas. (No, I am not talking about our bodies!) I am talking about those areas in a home that might be considered "common areas" which you have to share a space with someone. Oh sure we try our dangdest to make it work. You shuffle and move things around to always come back to it and realize it is not working for you. In my case, I have to share a space with a man that knows nothing of real organization. He is of the school of thought that if it is out of sight, it is organized. I am serious! He cracks me up the way things are for him. My idea of "organized" is a functional plan that can be executed. It will be great if I can make it look good, but if it doesn't work for day to day and cannot be carried out regularly, it doesn't matter what it looks like.
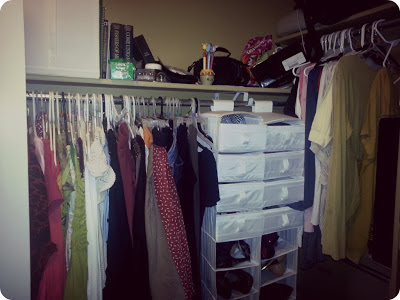
Welcome to my master closet. Hmmm, what do we have in here? Because it is not just our clothes and shoes and stuff. If you are a parent then you know that your space is NEVER your own. You "share" it with all the little people AND their toys. Even right after you clean it, the little people come in gawking at all the open space and bring their toys in to have a tea party!!!
I need some major help in this area. I was so spoiled with our house in South Carolina. We had his and her closets.... with space to put all your stuff....you didn't have to wrestle the hangers to slide them to hang a shirt up....there were shelves for everything..... And then SNAP!!! We have our Master closet here. It has space, but no function! I am convinced that homes are designed by single hermit men that think of the most ridiculous use of a space AND ADD IT TO THE FLOOR PLAN. Yes, I am frustrated if you cannot tell.
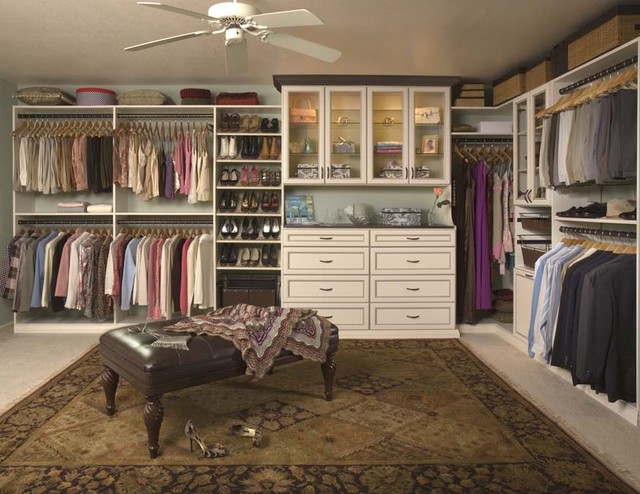
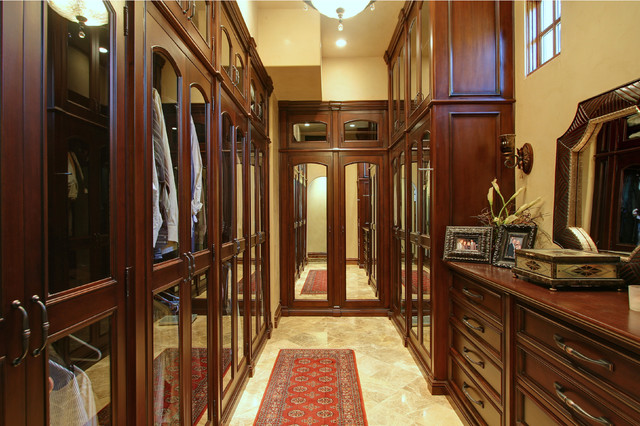
So to find some inspiration.... I Pinterest, Google, and Bing it! "Crrcchht, Could we have a dose of logic delivered to the internet please? Over, crrcchht". Are. You. Kidding. Me. These are layouts/ideas for closets the size of my FAMILY ROOM! This is not real life (at least not my real life). I am not spending $1000's on a new system here. (I just want to find the drawer my red pumps are in?!?)
Yeah. Uhhh, none of these (as beautiful as they are) will work for me. This is the space I am working with here:
It's sad, on a good day. Yes!!! Those are boxes from DVD players, and cases for Nintendo DS games! Why are they in my closet?!? No idea! I have got to get this space working. So, off to the drawing board... or at least the Sketch Book- to take measurements and see if I can come up with an execute-able system.This is what I have to think about:
Welcome to my master closet. Hmmm, what do we have in here? Because it is not just our clothes and shoes and stuff. If you are a parent then you know that your space is NEVER your own. You "share" it with all the little people AND their toys. Even right after you clean it, the little people come in gawking at all the open space and bring their toys in to have a tea party!!!
I need some major help in this area. I was so spoiled with our house in South Carolina. We had his and her closets.... with space to put all your stuff....you didn't have to wrestle the hangers to slide them to hang a shirt up....there were shelves for everything..... And then SNAP!!! We have our Master closet here. It has space, but no function! I am convinced that homes are designed by single hermit men that think of the most ridiculous use of a space AND ADD IT TO THE FLOOR PLAN. Yes, I am frustrated if you cannot tell.
So to find some inspiration.... I Pinterest, Google, and Bing it! "Crrcchht, Could we have a dose of logic delivered to the internet please? Over, crrcchht". Are. You. Kidding. Me. These are layouts/ideas for closets the size of my FAMILY ROOM! This is not real life (at least not my real life). I am not spending $1000's on a new system here. (I just want to find the drawer my red pumps are in?!?)
Yeah. Uhhh, none of these (as beautiful as they are) will work for me. This is the space I am working with here:
 |
| Standing in the doorway |
 |
| HIS.... |
 |
| HERS... |
 |
| I have been using these clear tackle boxes for jewelry, but I would like it out and displayed for easier access |
 |
| This is the catch all for any jewelry, whether it is mine or not. THAT has to be detangled.... |
- We Are Tall Peeps: I come in at 5'11" and my husband is 6'6". Therefore the space at the top of the closet it usable space for us.
- This also means our clothes might be longer so I might need to adjust the height of the bars.
- Storage Space Is Mandatory: For women, a lot of things we own are not always seasonal. I have purses, shoes, scarves, and jewelry that I use year round. So I need to think of a way to store these things that don't take a lot of space.
- If It Looks Pretty Than I want It To Stay Pretty: This concept applies to all of us. When a space looks nice and is inviting, we tend to want to keep it that way rather than ignoring it. If I can design something where I might be able to add some decorative wall/contact paper to make the closet be an extension of our room, it will help me want to keep things organized.
Okay, I am off to see how I might be able to pull this project together before Spring gets here!
Thursday, February 7, 2013
"Grateful" Craft Frame
I have run out of end table space! And mantel space. My front buffet is pretty crammed too. I am serious! That is why I did a wall piece for our November craft group. Wall space is easier to come by at my house, and I was hoping anyone who signed up had the same issue.
This project had its fair share of obstacles. I had already posted "concept" pictures in the FB group and-because my dad had been in the hospital- inspiration had not been flowing.
I spent hours designing the first set of tags, and I was sooo not happy with them, but I was running out of time. I felt like I was settling. I can't explain what happened, but about 2 days before all the sign ups were due, something (or someone) became my muse. I was at the hospital with my dad when it all came to me.
I realized the problem was I was trying to design something for other people vs. what I would want in my home! So I came up with a neutral backdrop and added color that I wanted, realizing that I could exchange my accent color with a color anyone else would want.
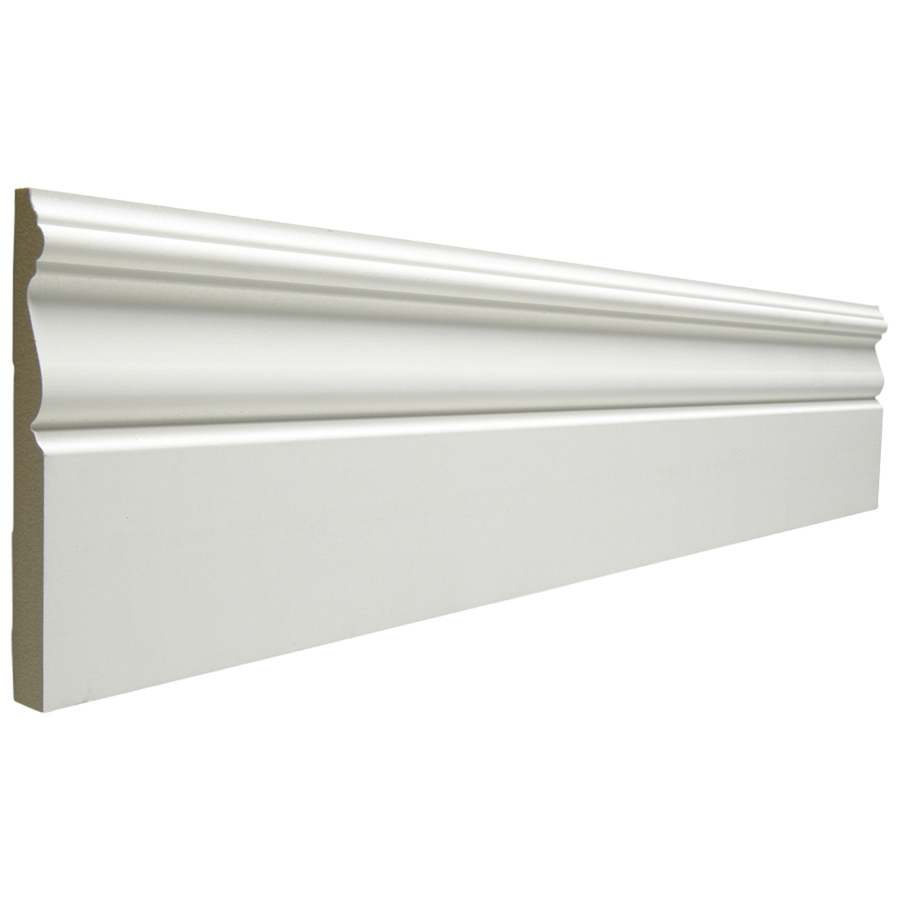 |
| Stock photo of baseboard moulding |
I began this project with some baseboard moulding. My frame measures 18"x22" from outside edge to outside edge. So I measured 2 pieces at 18" and 2 pieces at 22". I then cut them with a compound mitre saw at a 45 degree angle. Then I used some clamps to first wood glue the angles, and then secured them with a brad nailer. Then I stretched the wire across the back of the frame and glued with a puddle of hot glue. Since the moulding itself was thin, I did not have any type of fastener that wouldn't go all the way through. I am sure there is some out there, I just didn't want to go buy anything so I was willing to sit there and hold the wire while the glue cooled. :) I took a pair of needle nose pliers and made a twisty type loop to give the glue something to hold on to. How you space your wire depends on how big your tags are.
I would love to have this post be a tutorial. But, it cannot. This is one of those personal projects, in which you have to decide what you want on your frame. But I will tell you a little bit of what I did in case you have an itch to make one yourself.
I used 2 1/2 inch chipboard letters and covered them with teal paper. They spell the word F-A-M-I-L-Y. I also inked the edges for that distressed look. I used a broken necklace to create the chain embellishment, and added the 2 beads at the end of the chain. I also put a heart and a key charm together to hang on the wire on the left side of the photo.
I love details. Embellishments are details. Texture and shape are details. So you can see that on the rosette tag, I could have just left the ribbon rosette alone but I put a rhinestone pin through it. I reminds me of those vintage hat pins.I formed the hanger out of wire. Don't be afraid to try and fail. I learn my most valuable lessons in crafting when I mess up. I hung the pennant flags from the hanger and added the butterfly and those teensy pearls for his body. I added the same pearls to the clothespin for detail.
I added a vintage copper brad to the pinwheel, and used modge podge to put glitter on a few of the clothes pins. I used my Silhouette to cut out some tags to write things I am thankful for. I did not glue them in case I want to change anything later. On the large and small clothespins I used embossing powder to add color rather than modge podging all of the clothespins with coordinating paper.
I hope this inspires you to create your own work of art. If it does, leave a comment and a link as I would love to see it!
Friday, October 5, 2012
I Changed My Mind
It's 2 am. I can't sleep. So what am I doing? Blogging about paint colors....
I painted my front hallway a while back. (Which I do not have a picture of as my phone crashed and I lost the photo, this is all I could find!)
At first, I loved it. I loved the color etc, then I painted my ceilings, followed by the kitchen, then the Living room. I loved it too. I was really hoping it would solve my perceived problems.
It. Didn't.
This is my problem:
When my house was being built it looked really light infused, cheery even. Now, for whatever reason it looks dark, and gloomy. I chose hard floors (in my kitchen and entryway) that were one of the worst decisions I have EVER made! I think they have a defect. No matter how I care for them, they have no shine or luster. They actually look cleaner when they are dirtier? In addition to this they suck the life right out of the room!
Needless to say, I am really struggling with inspiration.
Needless to say, I am really struggling with inspiration.
I really want a place that is my home. A place that no matter where I have been I walk in the door and think "Ahhh, I am home!" not...."ugh, its looks dingy in here..."
So I am facing a dilemma... I am a lover of rich colors. Deeper hues, as you can see from the swatch above.
Reds, golden yellows, dark blues, celery greens. And I am facing an alteration in my go to colors for the last 10 years cause they don't work in this home. It is making me feel like I found out I was switched at birth or something... It goes against everything I know!!!
So, I went with what seemed to be the best color scheme I could find on paint chips, and put them on my walls. I seriously didn't even buy a small jar to test. I dove in with my clothes on. I also decided to add something else to this boring little hallway as well.
Ta DAHHH!!!
I have a few more cute things I am adding to this (like a doorbell cover and light switch plate! Ha!), but I am painting them now.
**UPDATE**
I am done with my refinishing of frames and here is the finale! I love the way it turned out!
So I am facing a dilemma... I am a lover of rich colors. Deeper hues, as you can see from the swatch above.
Reds, golden yellows, dark blues, celery greens. And I am facing an alteration in my go to colors for the last 10 years cause they don't work in this home. It is making me feel like I found out I was switched at birth or something... It goes against everything I know!!!
So, I went with what seemed to be the best color scheme I could find on paint chips, and put them on my walls. I seriously didn't even buy a small jar to test. I dove in with my clothes on. I also decided to add something else to this boring little hallway as well.
To give you and idea of the darkness in the front of the house, this picture was taken at 10:30in the morning! To my right is a tall slender window by the front door. Yes, even the hallway light is on. I chose a height I want the chair rail to be and I drew a line with a level.
Here, you can see the marks I made to note where I wanted the vertical slats to go.
I know a lot of people have a hard time doing the math for the spacing in a project like this. It is confusing to some, but here is the method, simplified (I hope!):
- Measure the length of the wall you are working with. Go with inches, not feet.
- Decide how many slats you want in that space. Here, I wanted 4 on a 47" space.
- This is NOT the tricky part. However many slats you want (4), add one for doing the math. 4+1=5
- Take the space you measured (47 inches) and divide by your slat number plus the one (5). 45/5=9.4 inches. That is your spacing.
- This has the potential to be the tricky part: To turn the 0.4 to a fraction, go back to 3rd grade, and remember that first digit after the decimal is the TENTHS digit which makes this number 4/10. Simplify the fraction and you get 2/5. Go from there.
This is the teeniest tiniest wall inside the hallway you cannot see from the other pictures. I have rounded corners in my house, and this is how I ended the chair rail, as I do not want it wrapping the corner into my entry way. Back cut your chair rail in a 45 degree angle. Fill with a little piece that has also been cut at a 45 to meet, and then a regular 90 degree where it meets the wall.
After lots of caulking and hole filling (which I thought you didn't really need pictures of), this is what came about.
I have a few more cute things I am adding to this (like a doorbell cover and light switch plate! Ha!), but I am painting them now.
**UPDATE**
I am done with my refinishing of frames and here is the finale! I love the way it turned out!
Saturday, July 7, 2012
Monogram "Wreath"?...
Do wreaths technically have to be round, with foliage, or flowers, vines and ribbon? I don't know either... but this is close enough. Do any of you have the same problem as me, in which you you need a wreath for the other 8 months of the year when it isn't Fall, Halloween or Christmas? I decided to solve my problem with a Monogram "Wreath".
I started with this frame and wooden letter. I purchased both from the Wood Connection. figured I didn't need to snap a picture of the raw wood, so I painted it first. These strips of ribbon are the ones I choose to coordinate with the project. After painting it a light color of gray, I changed my mind and painted it a darker one.
After it was painted I sprayed it with a coat of clear gloss spray paint. Then I tied the ribbon around the frame. Keep it a tad bit loose so the board can still fit against the frame. To keep the ribbon ends from fraying you can do this quick little trick
If you can, get self drilling screw so you don't have to pre-drill. I had some of these on hand so I could anchor the triangle hanger on the top of the frame.
This is what it looks like when they are attached.
After I found a pattern of paper that I wanted, I glued the paper to the thin wood backing that comes with the frame. DO NOT ATTACH IT TO THE FRAME YET.
If you look closely at this picture you can see I ever so lightly traced the letter on the paper so I knew where I needed to place the screws for the next step.
Drilled 3 screws through the front side of the frame so that I would know where the holes would be behind the frame. And then removed them.
Because the backing on the frame is such a thin wood, you really want to make sure you don't counter sink the screws. Keep them above the backing like so, so you don't crack the board.
This is the side profile once the letter has been attached to the backing.
So the backing combined with the weight of the wood letter is too heavy for the little tin staples to keep the board held in- so I put large dots of glue in the corner of the frames to hold the backing in place.
Before hanging you masterpiece on your front door, I suggest that you put these little felt pads at the bottom so that it doesn't destroy your front door, or your new wreath.
And here is the finished product. :)
Labels:
Craft Group,
Crafting,
Decorating,
DIY,
Tutorials,
Wood Connection
Subscribe to:
Posts (Atom)


