Image Map

Tuesday, October 30, 2012

We Could All Learn a Lesson from a Child

PUDDLE WARNING: This post might have the possibility of creating puddles of happy, touching tears. You have been warned. :)


I have been so very blessed. I have been given very good children. Oh they have their moments of fighting, teasing, and yelling at each other (Stop breathing on me!), but their nature is innately good. Since this whole thing with my Dad, we have done a lot of talking about helping my parents and what will be required of all of us. We had a family meeting and told them all of what was going to happen to Opa (dutch for grandpa). He was sick, he would be in the hospital for long time, he would lose his hair, and we couldn't bring the sick bugs to him.We talked about everyone sacrificing, so we can help my parents. They have been so good to do their part. 

There has also been a lot of discussion about finances, as hospital bills can get quite steep. I have a monthly craft group, and I decided, that all proceeds will be donated to my parents. My daughter Aunna, who is 11, proposed that all the kids do more to help around the house, so I could help my dad at the hospital, and have time to work on the crafts for the group. We also discussed the plans for a fundraising Boutique and how that would help financially for my parents. I would have to be making a lot of the crafts myself, so they said they would help with dinner too.
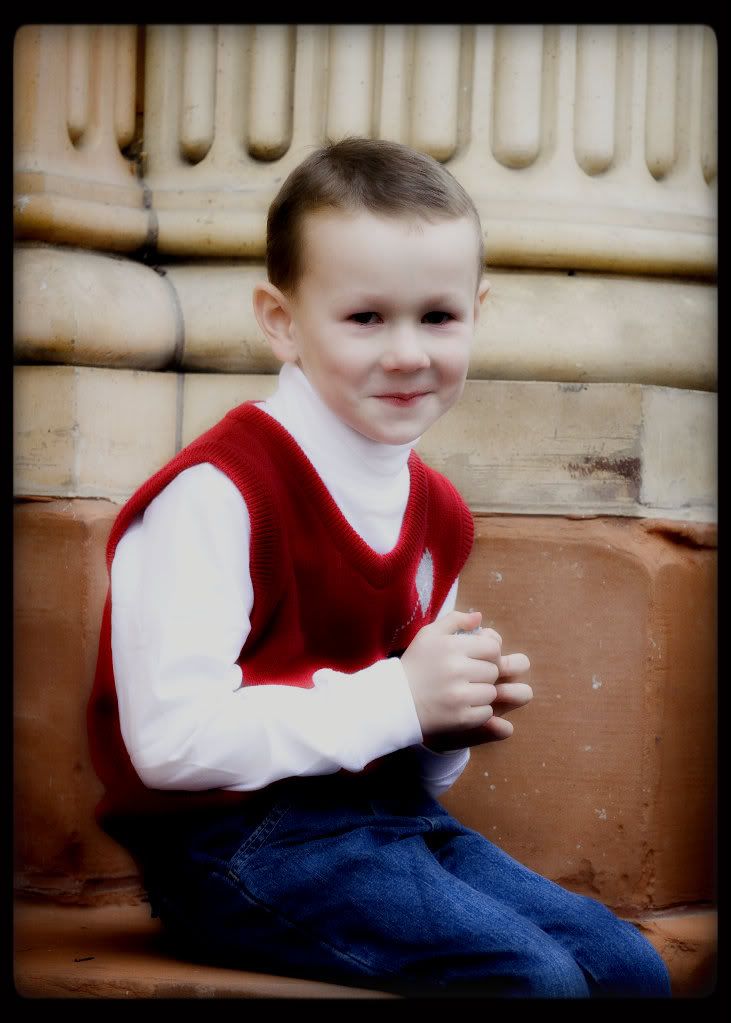
Bradley
Then this is where you will need your hankie... 
My 7 year old, Bradley comes to me and crawls onto my lap, turns my head to face him, and says: "Mom, I have some dollars, 3 I think. Can I give them to Opa?" At this point I was doing my best to hold it together. I told him that I was sure Opa would be so grateful to have them. Bradley then proceeds to ask me what else he can do to help raise money. He proclaimed he wanted to start a "Lemonade Stand Business", that's what he called it. But since it was winter, he thought hot chocolate would be better, and in the summer he would do lemonade.

He said he needed a box, to write a sign. I asked him what he would write and he said he would put...
"My Opa has Leukemia, please buy some.
25 cents"

He has been working on what he needs to run said business. Hot cocoa (of course), cups, spoons and a giant thing to put it in (thermos). Then he said he wanted to go to all the houses being built in our neighborhood and ask the workers if they would buy some. "Because, mom, they are probably cold working outside."

Yes, I think we all could learn a lesson from a child.


Monday, October 29, 2012

Diagnoses


We've all done it. Heard some kind of tragic, life changing story that applied to someone else's life, and for a moment thought... "I am so glad these kinds of things don't happen to my family." I've done it. I personally have friends whose loved ones have been taken in an instant, or become sick, or even impaired. And everytime, my heart goes out to them completely, followed by that guilty thought.

Well, over the last 2 weeks, I have become that individual in your circle of friends. The one you have empathy for, feel compassion for, and then think..."I am glad it isn't me." On Wednesday, October 17, 2012 my dad was diagnosed with Leukemia.

Don't feel guilty though, you should be glad. We all have our individual roles in this life. And for whatever reason this is something my dad has to fight through, and in turn, we must deal with. These types of things are nothing you can really prepare for, emotionally that is. You have to experience and process the emotions, and in time you come to accept it.


I have to say though, as far as diagnoses go, we are lucky. When he was first given the news of Leukemia, they talked about a dual phenotype something or other. Meaning they thought he had both the ALL and AML types of cancer. Let's just say that prognosis was bad, like, no hope bad. I remember feeling kind of numb for those few days, and then... some good news. A few days later, the pathologists said it was just the ALL type, and we were pretty happy about that as far as families-that-just-received-cancer-as-a-diagnosis could be.

Now, 2 short weeks later we are trying to get into a routine of how best to help my dad, share the burden with my mom, and for me... make the most of the time. Not that we have been given a time, but I have noticed that since my dad has been sick, our relationship is different, he is different. I mean, how could you really stay the same? He tells me all the time to enjoy my kids, cause the time goes way too fast, that he loves me, and is proud of the mother I have become- and I see the joy in his eyes a lot brighter when I tell him the going ons of my children.

He has always told me he is proud of me, and I always knew it in the past, but now I am hearing it. Like it is sinking into my soul. And every moment I spend with him, I feel like is a photo shoot, memories I will add to my mind should the outcome not end up as optimistic as it started.


Tuesday, October 23, 2012

Charger Plates


This is my favorite time of year. I don't know why, but since I was young I have absolutely adored the fall, I love the crisp air, and warm sweaters. I love the fact you can wear denim and boots and you don't even need a coat!

Now, top this with decor and you have the perfect time of year!!!

A few months ago I had the opportunity to help a friend out in a bind. She designs and sells vinyl as a side business and her computer crashed. She has been trying to figure out a way to recover YEARS of vinyl designs. A call came in to her to help with an LDS women's ward function (most of us know as Super Saturday). It is a day dedicated to crafting! Sign ups are provided to be able to make said crafts.

 Since her computer is down, she gave that woman my number. 
I don't know why, but I am sooo excited to do this. When I met with the lady in charge of this one project, she said they had 13 inch charger plates that they wanted to do vinyl on. I was given full creative reign of what I wanted to do! 

How cool is that? The only thing I have had a really hard time with is remembering to keep cost in check and not give away my services or product. This is definitely a learned attribute...


This is the HALLOWEEN plate. I know this type of saying is EVERYWHERE!! But honestly, I love it. I designed the spider web and spider, and just added the font.


Here is the FALL/HARVEST plate. I made this specifically for use during September, October, and November. I love keeping my pumpkins up as long as I can.


Last but not least, the CHRISTMAS charger. Every once in a while I do things that even amaze myself.This is one of those things. I designed the star, and put a lot of work into it, and I love it! Not the most spectacular things ever, but it brightened up my week to make them.

Friday, October 5, 2012

I Changed My Mind

It's 2 am. I can't sleep. So what am I doing? Blogging about paint colors....
 I painted my front hallway a while back. (Which I do not have a picture of as my phone crashed and I lost the photo, this is all I could find!)

At first, I loved it. I loved the color etc, then I painted my ceilings, followed by the kitchen, then the Living room. I loved it too. I was really hoping it would solve my perceived problems.
It. Didn't.
This is my problem:
 When my house was being built it looked really light infused, cheery even. Now, for whatever reason it looks dark, and gloomy. I chose hard floors (in my kitchen and entryway) that were one of the worst decisions I have EVER made! I think they have a defect. No matter how I care for them, they have no shine or luster. They actually look cleaner when they are dirtier? In addition to this they suck the life right out of the room!
Needless to say, I am really struggling with inspiration.
 I really want a place that is my home. A place that no matter where I have been I walk in the door and think "Ahhh, I am home!" not...."ugh, its looks dingy in here..."
So I am facing a dilemma... I am a lover of rich colors. Deeper hues, as you can see from the swatch above.
Reds, golden yellows, dark blues, celery greens. And I am facing an alteration in my go to colors for the last 10 years cause they don't work in this home. It is making me feel like I found out I was switched at birth or something... It goes against everything I know!!!
So, I went with what seemed to be the best color scheme I could find on paint chips, and put them on my walls. I seriously didn't even buy a small jar to test. I dove in with my clothes on. I also decided to add something else to this boring little hallway as well.


To give you and idea of the darkness in the front of the house, this picture was taken at 10:30in the morning! To my right is a tall slender window by the front door. Yes, even the hallway light is on. I chose a height I want the chair rail to be and I drew a line with a level.


Here, you can see the marks I made to note where I wanted the vertical slats to go. 


I know a lot of people have a hard time doing the math for the spacing in a project like this. It is confusing to some, but here is the method, simplified (I hope!):
  • Measure the length of the wall you are working with. Go with inches, not feet.
  • Decide how many slats you want in that space. Here, I wanted 4 on a 47" space.
  • This is NOT the tricky part. However many slats you want (4), add one for doing the math. 4+1=5
  • Take the space you measured (47 inches) and divide by your slat number plus the one (5). 45/5=9.4 inches. That is your spacing. 
  • This has the potential to be the tricky part: To turn the 0.4 to a fraction, go back to 3rd grade, and remember that first digit after the decimal is the TENTHS digit which makes this number 4/10. Simplify the fraction and you get 2/5. Go from there.


This is the teeniest tiniest wall inside the hallway you cannot see from the other pictures. I have rounded corners in my house, and this is how I ended the chair rail, as I do not want it wrapping the corner into my entry way. Back cut your chair rail in a 45 degree angle. Fill with a little piece that has also been cut at a 45 to meet, and then a regular 90 degree where it meets the wall.

After lots of caulking and hole filling (which I thought you didn't really need pictures of), this is what came about.


Ta DAHHH!!!

I have a few more cute things I am adding to this (like a doorbell cover and light switch plate! Ha!), but I am painting them now.

**UPDATE**

I am done with my refinishing of frames and here is the finale! I love the way it turned out!

Friday, September 21, 2012

Time

It really makes me cringe to think of posting something without pictures. And I wouldn't do it if it wasn't necessary. I just wanted to drop a line in and let everyone know I haven't forgotten about my blog. It has been a really tough 7 weeks! Wisdom teeth extraction followed by a car accident involving all of my family, school starting, and life adjusting with my baby in kindergarten!
The accident has put a HUGE setback to many-o-things but I am almost back on track. I have pictures, and crafts, and more recipes coming soon!

Monday, September 10, 2012

Post Pumpkins


If you have ever done a Google search for pumpkins made of wood, you find many o' types, and if you are like me, none that really appeal to your taste!
There are many made of the 2 x 4 type, I even have a set (I made them at a church activity for free, and I am working to dress them up currently).These range from the single 2 x 4 cut in varying heights to create a "set". I have even seen the ones with three 2 x 4's glued together to make a block of a pumpkin.

 If you type in "post pumpkins", these are the ones that are made from the round fence post that has the flat edges. Those always seem really out of proportion to me... What are they?...about 4 inches in diameter and about 3 feet tall. Mmmm, sorry, no thanks. 
I wanted something classy and timeless, so again, off to the drawing board to figure out how to make what I am seeing in my head.

Did you know there is such an animal as an 8 inch x 8 inch post? Because I don't have the equipment capable of cutting it, I had to settle for the 6 inch x 6 inch size. Even then, I have to run it through the table saw twice by flipping it over just to cut it once. 

My wonderful neighbors happened to have a bunch of these 6 x 6 posts to the side of their house that had been weathered already. Perfection!
I forgot to take a picture of the next step, but if you zoom in you can see on the middle pumpkin I used a jig saw to skim off the edges.
Obviously with worn wood you have to sand down your pumpkins.


Then, I drilled a hole in the top with a  1" butterfly bit. This is a stock photo of what one looks like.


I was by myself for this next step, so I didn't take a picture. I will do my best and explain. I got a roll of medium size hemp twine from WalMart, and some picture wire from Lowes (not the weaved mesh stuff, just regular silver wire). I clipped the wire to the lengths I wanted. I vut the hemp twine 3 times the length of the wire. The wire is thin enough to insert one end of the wire into the tip of the glue gun about a half inch. This just gives a tacky surface to the wires and then I started to wind the hemp around the wire. When you get to the end, use the same technique of inserting the wire into the glue gun and the keep wrapping the twine to stick it to the wire.I used a thin marker to wrap the vines and get the even twirly look. Keep one end kind of straight to insert into the burlap stem.


Once, I drilled them, I painted them. To keep with that rustic look, I wanted to find some sticks, but couldn't. So I settled for burlap. I cut strips about 1" in width. Using hot glue, I started off the rolling, and ended by including the "vines" in the last wrap around.
Then you just decorate!

I used a chiffon type green wire ribbon,  I cut it into about 4 inch lengths. I put a stripe of hot glue at the end, gathered the center parts, pinched it towards the center by bringing the wire ends together. This created an oval looking "leaf".


Before adding the bow, I sprayed them all with a clear gloss spray paint. It didn't make them shiny, it actually richens the color, and makes keeping the dust away much easier.

Monday, July 30, 2012

Homemade Pizza


In our family, pizza night from retailers is just like "eh". BUT... If it is homemade pizza night, they kids shout for joy, there is love in the home, and you would think world peace has been achieved! I think this has more to do with the RECIPE than anything else.
I started long ago collecting (and tweaking) recipes to be worthy of making for my family or taking to gatherings. Some are made occasionally and others have become a staple in our home. This is one of the staples. I owe this to one of my besties (Tonya Bennett) The recipe for the dough is multi-purposeful. In addition to pizza crust and bread sticks, it makes for awesome scones, and Navajo Tacos.
I will warn you though... once you try this, there is no going back!


 DOUGH

4 tsp Dry Active Yeast
1/2 c. White Sugar
1 1/2 c. warm water
4 c. White Flour
1 tsp salt
1/4 c. oil

In small glass bowl combine yeast, sugar, and water to activate yeast. Set aside for about 5 min. In large mixing bowl add flour and salt. After yeast has doubled, add oil to the yeast mixture. Add yeast mixture to flour. and mix until sides pull away from bowl and continue to knead for about 5 min. place moist towel and let rest for 10 minutes.  After resting dough, use desired amount to make large pizza crusts, or personal pizza crusts. Oil surface first. Add sauce and toppings. Bake at 425 degrees for 15-17 minutes. Bake for 11-13 minutes for bread sticks. Makes 2 medium pizza crusts. (Large Round Pampered Chef Pizza Stone)

SAUCE

1 sm can Tomato Sauce
1 sm can Tomato Paste
1 Rounded TBSP White Sugar
1/2 tsp salt
1/2 tsp Pepper
1 Tbsp Italian seasoning
1 tsp Oregano
1 tsp Basil
1 tsp Parsley
1 tsp Garlic Powder (or fresh pressed garlic clove)
1 tsp Onion Power
1/4 tsp Hot Sauce (Tabasco-optional)

Mix together well. Heat for marinara dipping sauce. No need to heat if using on pizza.

BREADSTICKS

1/2 ready made dough recipe above
1/2 cube melted butter
1 tsp garlic powder
1 tsp onion powder
1/4 tsp salt and pepper, each
1 tsp parsley
1/2-3/4 c. Fresh Parmesean Cheese

Mix everything except dough and butter on a plate. Put melted butter in a pie pan. Form dough into sticks. Roll in butter, then in seasoning mix. Place in pan.When all dough is used, if there is leftover butter or seasoning sprinkle on top of breadsticks. Bake at 425 degrees, for 11-13 minutes.


Yes, It is a lot of ingredients, but it is soooo worth it! Let me know when you make the recipe and let me know what you think! Happy baking!