
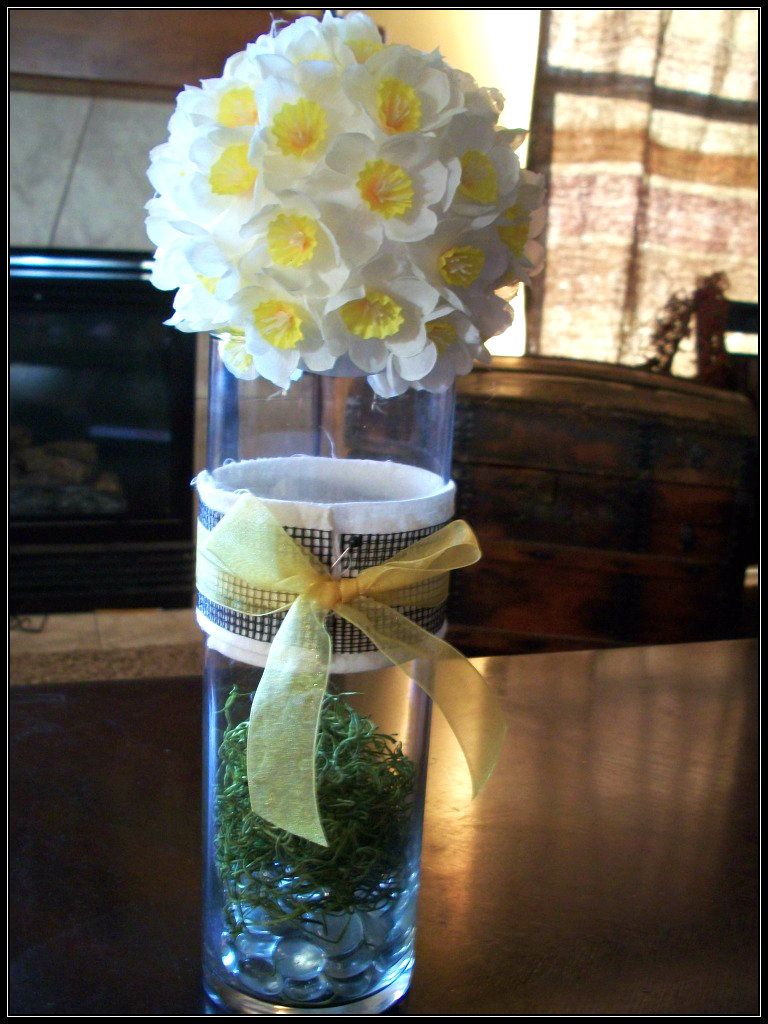
What should we call this project? A Flower Orb On Top Of A Vase? Yeah, I don't know what to call it either. I made this for my laundry room. I am not finished with the laundry room make over, and I am thinking of what to put on this awesome shelf I will be hanging on the wall.
This project was super easy. Yes I will be putting this in my laundry room, but I think this would be cute in a set of three, in an outdoor space, as a center piece. Staggering the height of each vase of course. I get really hesitant to post a craft tutorial. One of my gifts in this life is to see something I like, and be able to re-create it in my own way. Without instructions. So trying to do a tutorial in which instructions need to be there, I hope I am not going to leave people all confused.
This is what you will need for this project:
A Vase
Styrofoam ball bigger than vase opening
Flowers of your choice (flat flowers work best, like daisies etc)
Glue gun
Small nail
Ribbon- in a coordinating color
Optional:
Vase filler:
Pebbles
Spanish Moss
Sand
Etc.
Straight Decorative Pins
Fabric

This is what is required to complete the project. Of course you can add what you want to cutsie it up to your fashion. I purchased the vase at Walmart for $3, and bought the 3 bunches of flowers for $1 each. They also have a combo package of 6 smooth styrofoam balls (sold in the mailing area?) for $4. That worked for me because I needed the rest of them for another project, and used the 4" ball for this.
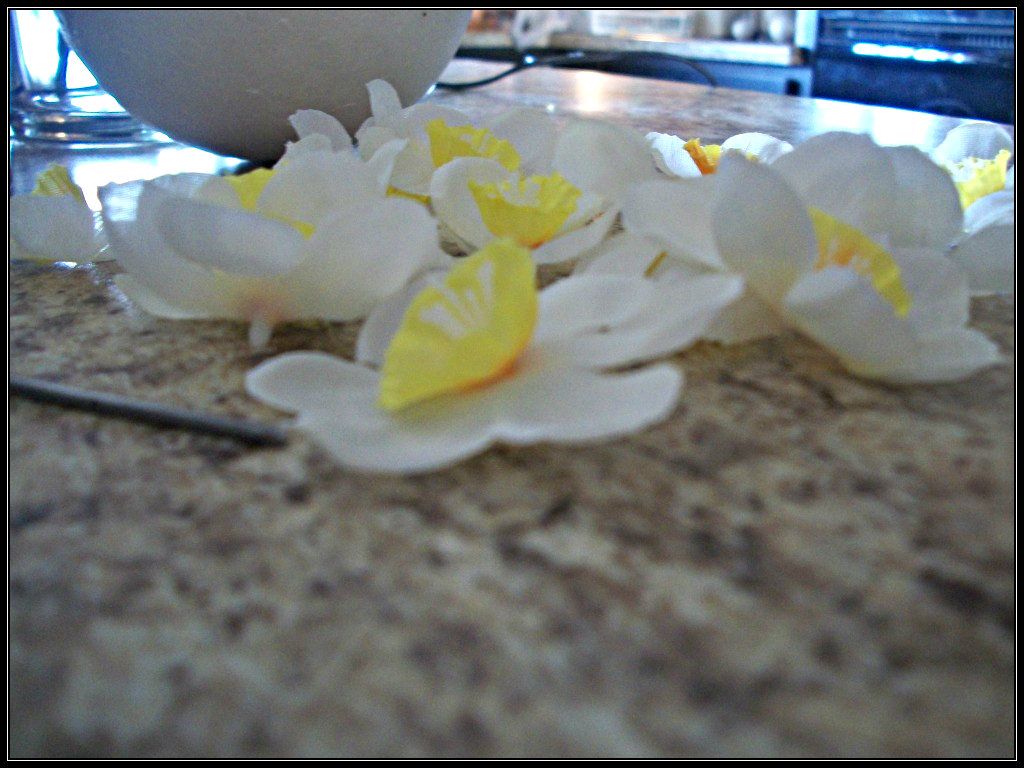
First things first, decapitate your flowers. Pull all the flowers off their stems.
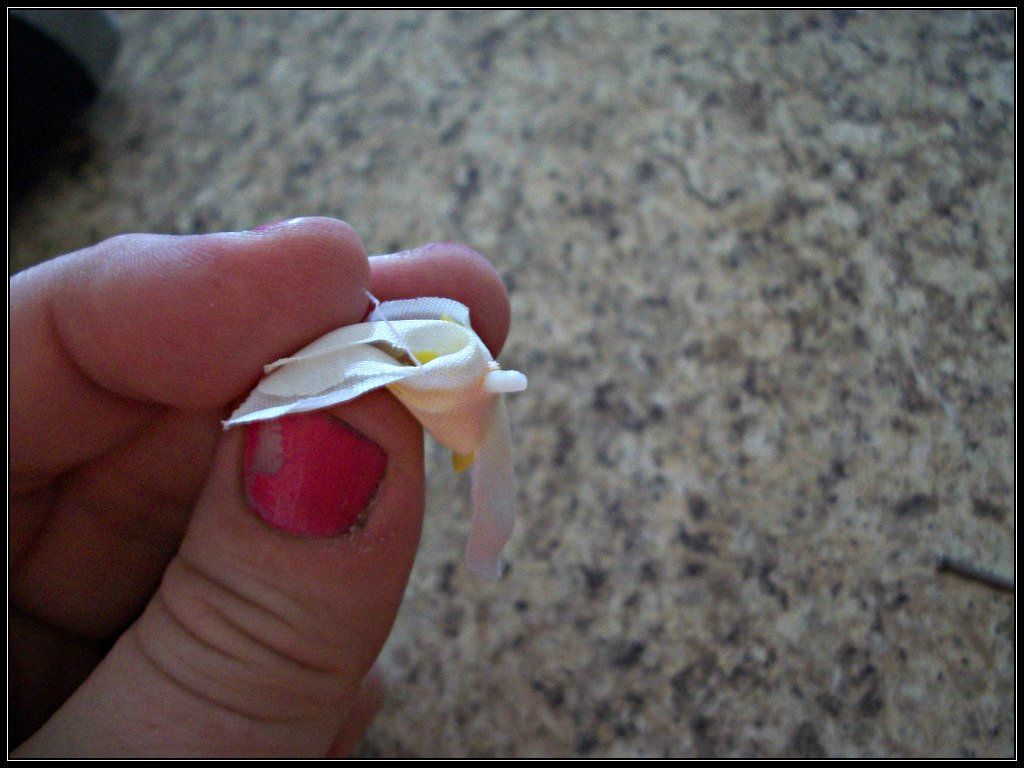
Keep the little plastic center sticking through the back of the flower, like so.
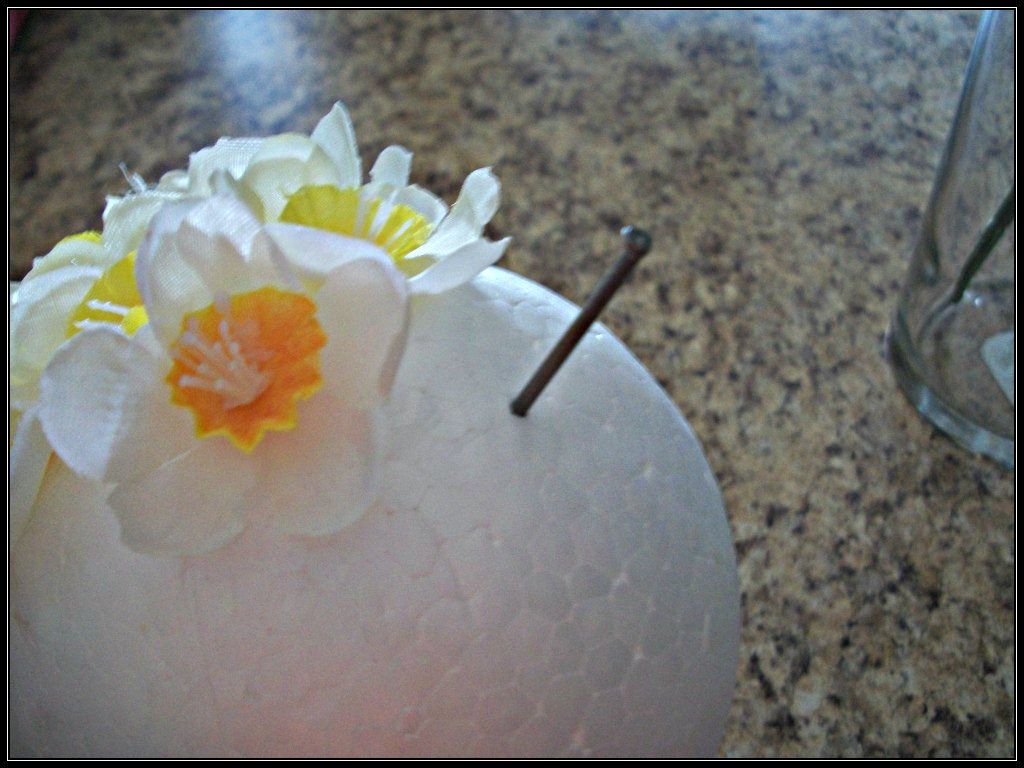
Use the small nail to poke a shallow hole in the styrofoam ball. The first few flowers I tried to glue sat tipping because the plastic center of the flower needed to go into the ball to keep it vertical. Use the nail it will keep the frustration level low.
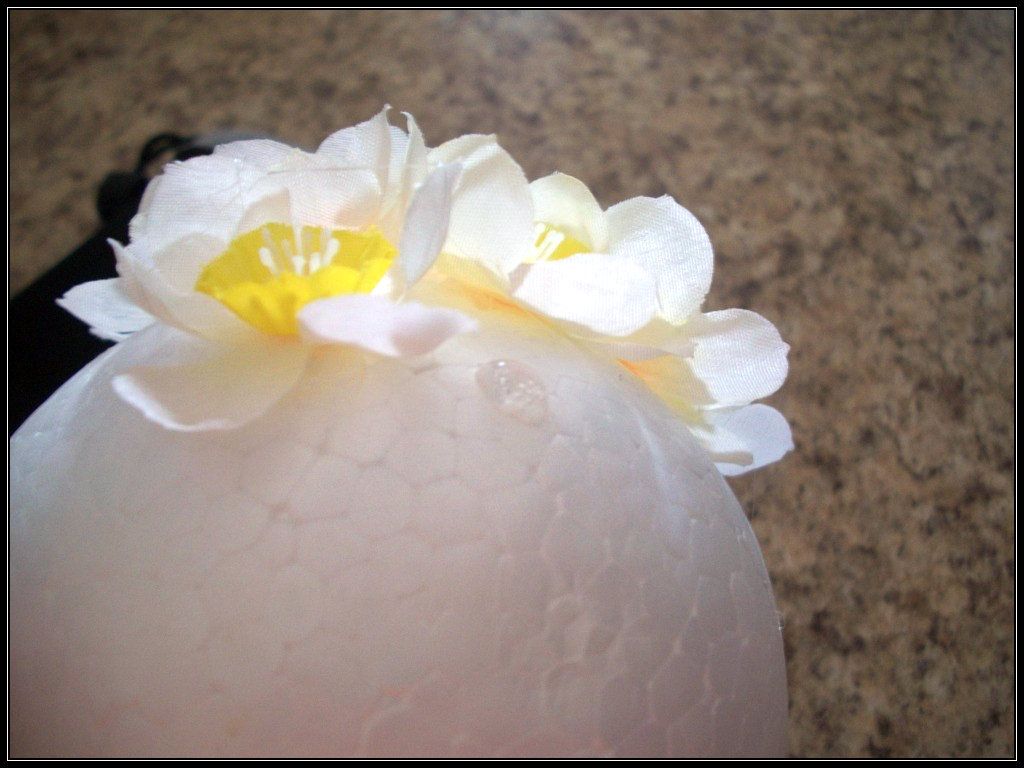
Put a small dot of hot glue over the nail hole and then press the flower to the ball inserting the plastic of the flower into the nail hole.

This is what it starts to look like when I was about a quarter of the way done. Keep going until you complete the sphere.
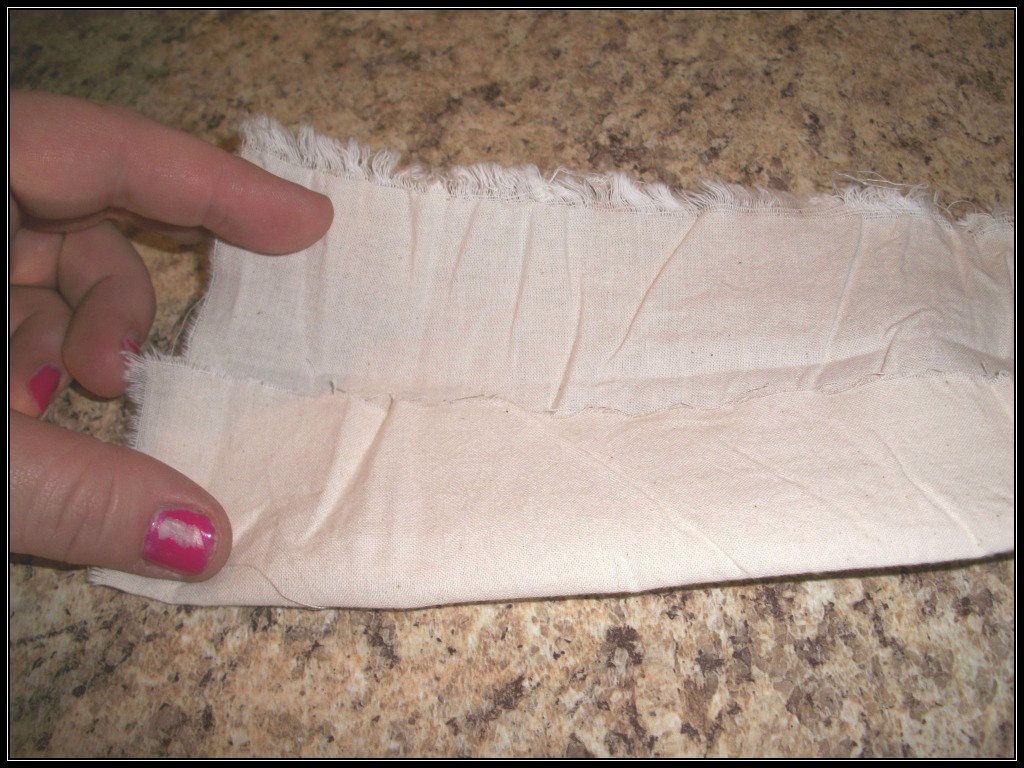
Next I tore a scrap of muslin fabric the length of a wrap around my vase. I folded it lengthwise into thirds to keep a nice top and bottom edge.
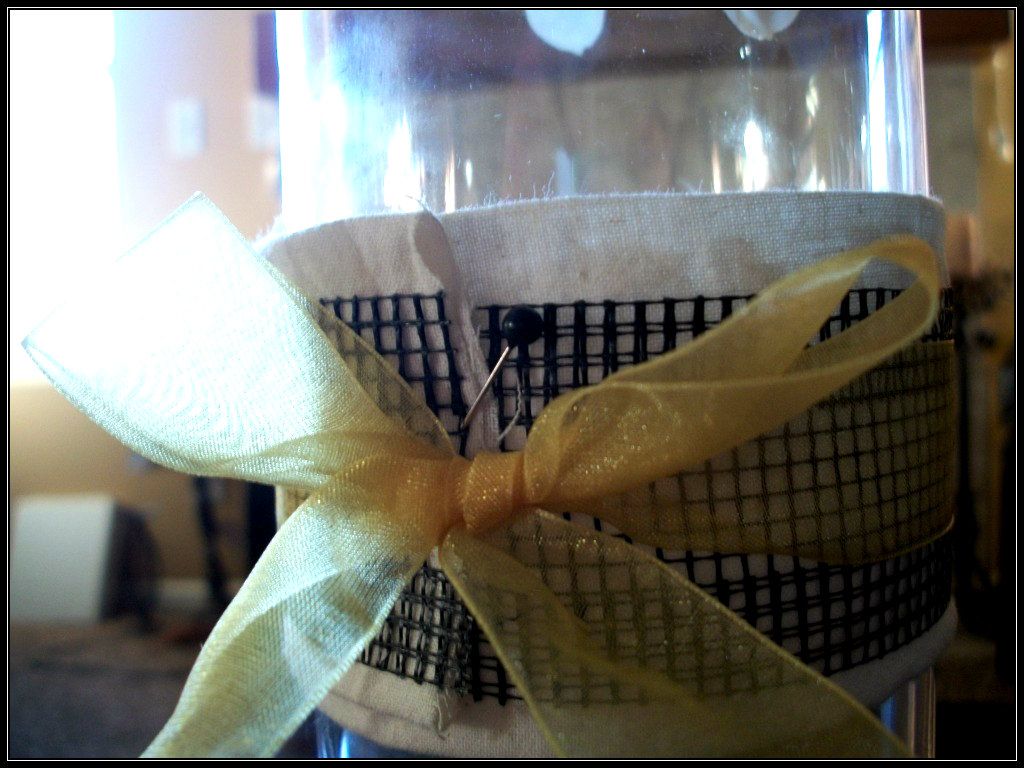
I trimmed the edge by the pin so it was straight. Here I used a plastic mesh I bought a long time ago at a scrapbooking store to overlay on the fabric. I pinned the edge with a pearlized black pin. I am looking for a really awesome one you know, like those old fashioned hat pins? Just haven't found it yet! Then I tied the ribbon over it all.
I had some small glass pebbles and some spanish moss that I put in the bottom of the vase to add some color.
Mine looks really simple. I didn't want it to compete with the wallpaper I am putting in the laundry room, but this could be really cute with a lot of other color combinations.
Happy crafting. Post a link in the comments if you make your own. I would love to check it out!

1 comments:
so cute! I need to try that. thank you for step by step instructions. thats awesome! it would be even more awesome to make it together;) haha
Post a Comment